SOLAR PANEL SYSTEM
Solar energy systems have increased dramatically in popularity in recent years, with more and more homeowners considering making the switch to renewable energy. One of the most important factors for making an informed decision about installing a solar panel system is understanding how the process works, so in this article, we’ll break it down into seven simple steps.
1. Do Your Research
This is one of the most time-consuming elements of installing a solar energy system. However, doing your research and due diligence first will set you up for success later in the process. Generally, when you hire a reputable solar energy contractor to oversee the installation process,the contractor will perform this research for you, but it’s always a good idea to know what’s going on behind the scenes.
First of all, you will need to research local and regional solar permitting laws in your area, to be sure that what you have in mind for your project is legal and will get the proper approval and permits. Local laws and codes may dictate which type of system your property is eligible for, whether that’s grid-tied or off-grid.
Next, you will need to do some math. Calculate what size of the solar array will be necessary to offset your monthly energy usage, taking into account your location’s weather and shade level as well as your budget. You can also calculate your return on investment (ROI) at this point, which will help you determine how long it will take to break even on your initial investment and start purely earning money with your solar energy system. Your ROI will vary depending on the quality of the equipment you purchased. We recommend that you ask yourself these 6 questions to help you choose the best solar panels before getting a quote to familiarize yourself with what is out there on the market to purchase.
Based on all of these factors, you can plan out the details of what your solar panel installation will look like and begin to assemble a list of components that will be necessary. This is also a good time to start looking into solar incentives that are offered by the federal government and/oryour state or local government to see whether they can be applied to your solar energy system, which will save you money.
2. Apply for Proper Solar Permits
The next step is to apply for all the required solar permits you will need to legally and safely install your solar system. Your solar installer or a 3rd-party solar permit specialist will usually take care of all of the permits since the permitting process can be complicated. States often have their own set of regulations surrounding the solar installation, with different governing bodies and processes. Often, the permit process includes building and electrical permits, to ensure that everything is installed according to code. This phase is also when you and your contractor will be applying for solar incentives like tax credits, rebates, grants, and solar-specific financing.
This phase is also when you and your contractor will be applying for solar incentives like tax credits, rebates, grants, and solar-specific financing.
3. Obtain Solar Panel Equipment
Once your solar energy system is approved and permitted, it’s time to actually order the components. This includes the solar panels themselves as well as inverters, wiring, mounting hardware, and batteries if you choose to include them in your system. Most solar contractors will offer you a few different options for each component, in a variety of aesthetic styles, efficiency and durability ratings, and price points. When your order has been placed, your project will be slated for installation in your contractor’s schedule.
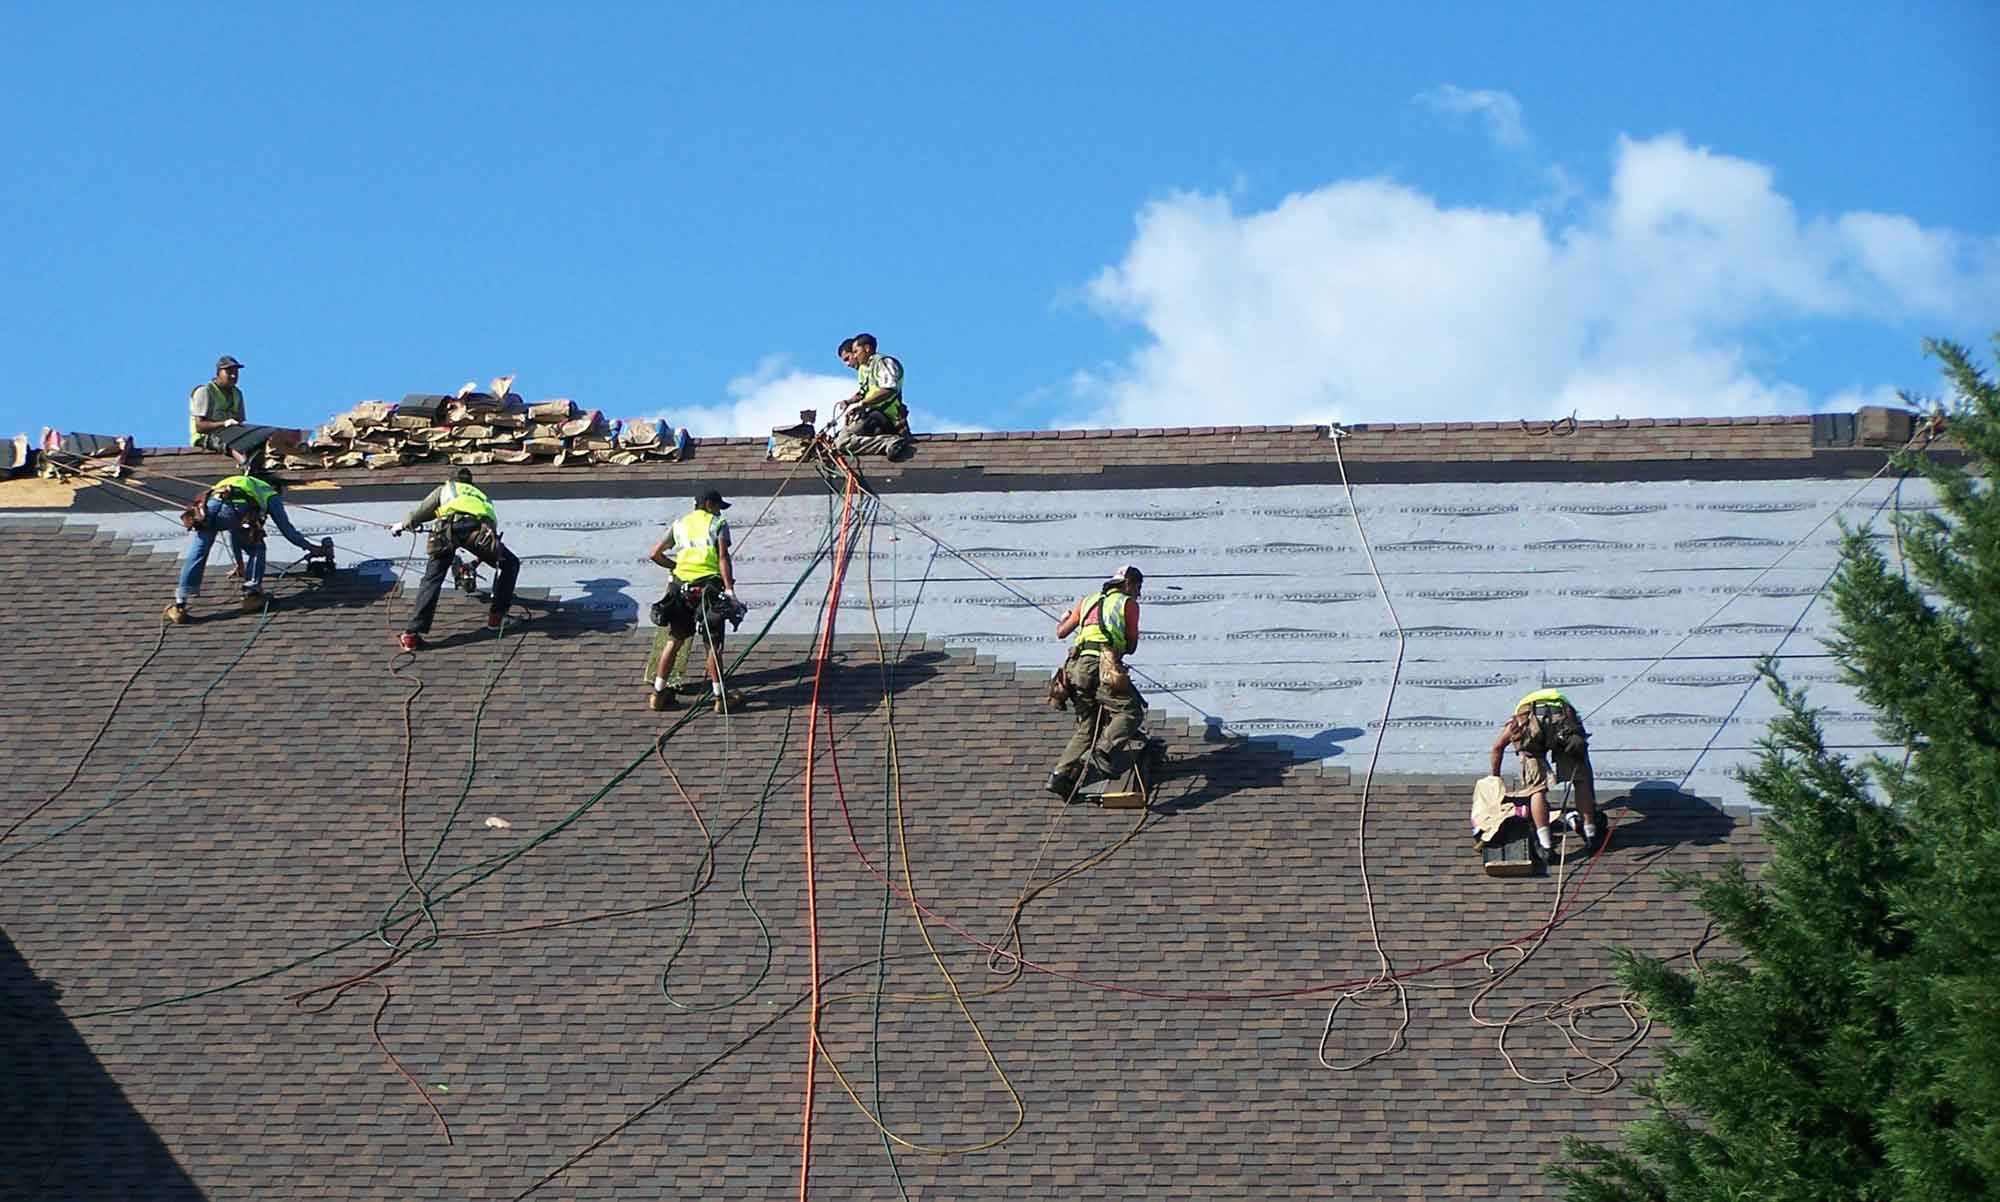
4. Install the Solar System on Your Home
This is the most exciting step of the process when you actually get to see the whole solar panel system come together. Your solar installer or contractor will evaluate and prep your roof or the ground area where your panels will be installed, and then start to lay wiring and install the panel racks. It’s important to ensure that your roof is strong enough to bear the weight of the solar panels and that the shingles or other roofing material is securely attached.
Once everything is in place, the contractor will fit the panels onto the racks and finish the job by connecting the panels to the inverter, which changes the current from DC to AC so the power generated can be safely used in your home and with the power grid.
The installation process can take anywhere from one to three workdays, depending on the size and scale of your system. Additionally, if you will be taking advantage of the net metering system, your installer may have to install the two-way meter, which will take extra time.
5. Pass Building and Electrical Inspections
Once the whole system is in place but before you can officially begin generating power, a government representative will need to come out to inspect your system. They will basically check your contractor’s work, ensuring that everything is up to code and safe to operate. Specifically, they will check that your panels are mounted sturdily and set back far enough from the edge of your roof and that everything is wired correctly.
6. Get Approval by Local Utility
Finally, if your system is connected to the local power grid, you will need to be approved for interconnection by the solar utility company in your area. They will send out a representative to do their own final assessment of the system and ensure that everything is connected properly so as not to cause a problem for the existing power grid. Once the utility representative gives the okay, your solar energy system can finally be “switched on.” This part of the process can sometimes frustratingly take a few weeks or even up to a month to get the final approvals of your system, but it’s always better to have the work double- and triple-checked than risk something going wrong.
7. Start Producing Free Renewable Energy
Finally, you can begin reaping the benefits of your solar energy system! These perks range from greatly reducing your energy costs to potentially keeping your electricity flowing even during a grid outage to doing your part in the green energy movement. Once your solar energy system has paid itself off, you will essentially have free or very inexpensive energy for the entirety of the time that the solar panels remain operational.